Customizing page appearance
The design of various AutoConnect web pages is basically inflexible. Its appearance and layout don't have many customizable visual aspects but nevertheless, you can customize the following appearances of your AutoConnect web pages:
- AutoConnect menu colorize (See Appendix)
- Make different menu labels
- Make different menu title
- Capture the legacy web pages as items into the menu
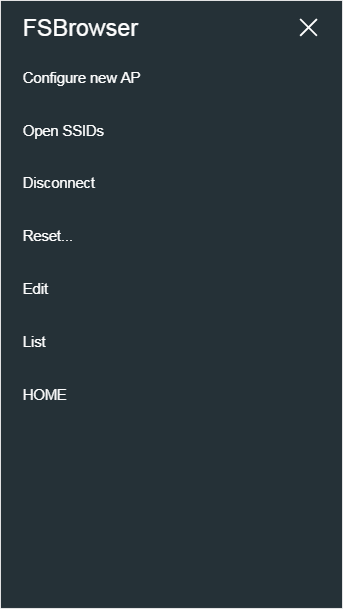
Make different menu labels
You can change the label text for each menu item but cannot change them at run time. There are two ways to change the label text, both of which require coding the label literal.
-
Overwrite the label literal of library source code directly.
You can change the label of the AutoConnect menu item by rewriting the default label literal in AutoConnectLabels.h macros. However, changing menu items literal influences all the Sketch's build scenes.
#define AUTOCONNECT_MENULABEL_CONFIGNEW   "Configure new AP"
#define AUTOCONNECT_MENULABEL_OPENSSIDS   "Open SSIDs"
#define AUTOCONNECT_MENULABEL_DISCONNECT  "Disconnect"
#define AUTOCONNECT_MENULABEL_RESET       "Reset..."
#define AUTOCONNECT_MENULABEL_UPDATE      "Update"
#define AUTOCONNECT_MENULABEL_HOME        "HOME"
#define AUTOCONNECT_MENULABEL_DEVINFO     "Device info"
#define AUTOCONNECT_BUTTONLABEL_RESET     "RESET"
#define AUTOCONNECT_BUTTONLABEL_UPDATE    "UPDATE"
build_flags with PlatformIO will no effect
The mistake that many people make is to use PlatformIO's build_flags to try to redefine any literal at compile time.
The AutoConnect library statically contains the label literals which are embedded as binary data when compiling the library code. The label literals will not change without compiling the library source.
And PlatformIO is a build system. Library sources will not be compiled unless AutoConnectLabels.h is updated. -
Change the label literals for each Arduino project
Another way to change the label literal is to provide a header file that defines the label literals, as mentioned in Appendix. You can also use this method to display label text and fixed text in the local language on the AutoConnect page. See Change the item's label text section for details.
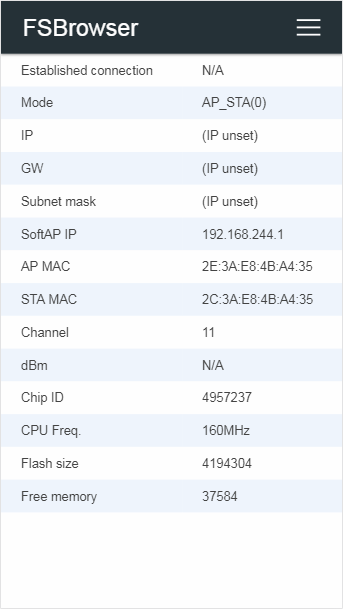
Make different menu title
Although the default menu title is AutoConnect, you can change the title by setting AutoConnectConfig::title. To set the menu title properly, you must set before calling AutoConnect::begin.
AutoConnect       Portal;
AutoConnectConfig Config;

void setup() {
  // Set menu title
  Config.title = "FSBrowser";
  Portal.config(Config);
  Portal.begin();
}
Executing the above sketch will rewrite the menu title for the FSBrowser as the below.
Capture the legacy web pages as items into the menu
You can embed the ordinary page processed by the ESP8266WebServer request handler as an item into the AutoConnect menu. AutoConnect can capture the legacy web pages for ESP8266WebServer or WebServer of ESP32 and extends the menu containing these items.
In ordinary, the Sketch registers the request handler for the page depending on URI using the ESP8266WebServer::on function. AutoConnect allows Sketch to bundle the registered legacy page into a menu. the Sketch is able to include its URI to a menu item using AutoConnect::append function that creates internally an AutoConnectAux depended on its URI and integrates into the menu.
The following code has a mixture of both AutoConnectAux and the legacy web page. An AutoConnectAux page is menued automatically with the AutoConnect::join or AutoConnect::load function. Similarly, a legacy page is integrated by the AutoConnect::append function.
#include <ESP8266WiFi.h>
#include <ESP8266WebServer.h>
#include <AutoConnect.h>

ESP8266WebServer server;
AutoConnect      portal(server);

// Definitions of AutoConnectAux page
static const char PAGE[] PROGMEM = R"(
{
  "title": "PAGE",
  "uri": "/page",
  "menu": true,
  "element": [
    {
      "name": "cap",
      "type": "ACText",
      "value": "This is a custom web page."
    }
  ]
}
)";

void setup() {
  // The Web page handler located to /hello
  server.on("/hello", [](){
    server.send(200, "text/html", String(F(
"<html>"
"<head><meta name='viewport' content='width=device-width,initial-scale=1.0'></head>"
"<body><h2>Hello, world</h2></body>"
"</html>"
    )));
  });

  portal.append("/hello", "HELLO");  // Adds an item as HELLO into the menu
  portal.load(FPSTR(PAGE));               // Load AutoConnectAux custom web page
  portal.begin();
}

void loop() {
  portal.handleClient();
}
The AutoConnect::append function also has the third parameter that directly specifies the request handler. It has similar efficacy to calling the append and ESP8266WebSever::on at once. 1
portal.append("/hello", "HELLO", [](){
  server.send(200, "text/html", String(F(
"<html>"
"<head><meta name='viewport' content='width=device-width,initial-scale=1.0'></head>"
"<body><h2>Hello, world</h2></body>"
"</html>"
  )));
});
For more details, see section Attach the menus of Examples page.
An instance of ESP8266WebServer/WebServer is needed
When calling the append function with request handler parameters, an instance of the WebServer as the registration destination must exist.
AutoConnect can instantiate and host a WebServer internally, but in that case, the point in time to call the AutoConnect::append function with a request handler parameter must be after AutoConnect::begin.
-
However, the pages registered this way remain legacy. Therefore, the AutoConnect menu bar is not appeared. ↩